
Projects Management
Projects Management
Category: Core Features | Audience: undefined | Page: 8 of 33
Table of Contents
- View and Navigate the Projects Tab
- Edit and Delete Existing Projects
- Manage Project Settings, Lifecycle, and Status
Projects Management
Welcome to the Projects Management section of Elixia Health's clinical trial platform. This guide will help you navigate and manage your clinical trial projects within the MCT application. The Projects section is your central hub for managing all aspects of clinical trials, from project details to associated sites, contacts, and vendors.
Key Concepts
- Projects Tab: Main navigation tab in MCT for accessing all project-related functionality
- Projects Data Table: Displays all clinical trial projects with key information including Project ID, Project Name, Account Code, Project Number, and Status
- Secondary Navigation: Sub-tabs under Projects provide access to related entities:
- Projects: Main project listing
- Studies: Study information management
- Sites: Clinical site management
- Contacts: Contact information
- Vendors: Vendor management
- Sponsors: Sponsor information
- CROs: Contract Research Organizations
- Postings: Job/study postings
- Profiles: Profile management
- Media: Media content
- Media View: Media file viewer
- Reconcile: Reconciliation tools
- Accounting: Financial tracking
- Send Email/Fax: Communication tools
What You Can Do
- View all clinical trial projects in a sortable, filterable table
- Search and filter projects by ID, name, account code, number, or status
- Access project details by clicking on project names
- Navigate between related project entities using sub-tabs
- View project status (Draft, Active, Inactive)
- Manage projects and their associated data
How To
Add New Projects
Log in to MCT as an admin.
Click on the "Projects" tab.
Click on the "Add New Project" button.
Enter the project name, description, and select the associated study.
Click "Save" to create the project.
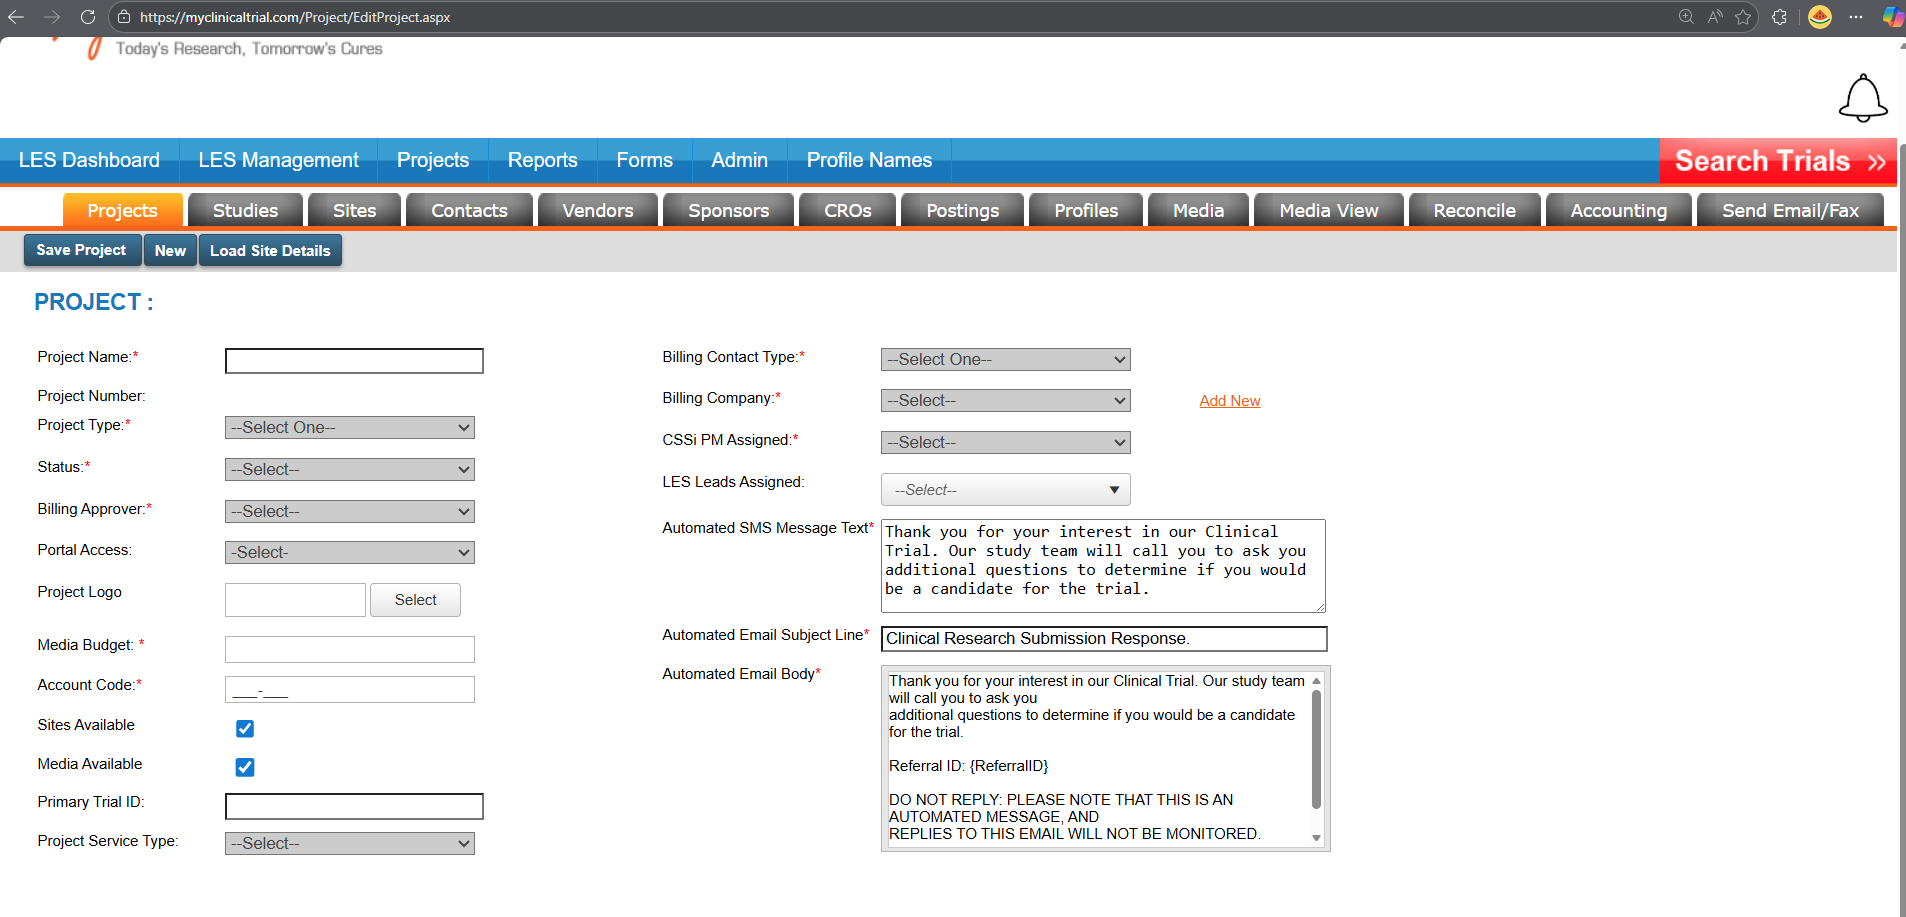
Access the Projects Section
- Log in to MCT at the MCT portal
- Click on the Projects tab in the main navigation bar
- The Projects sub-tab will be selected by default, showing the projects data table
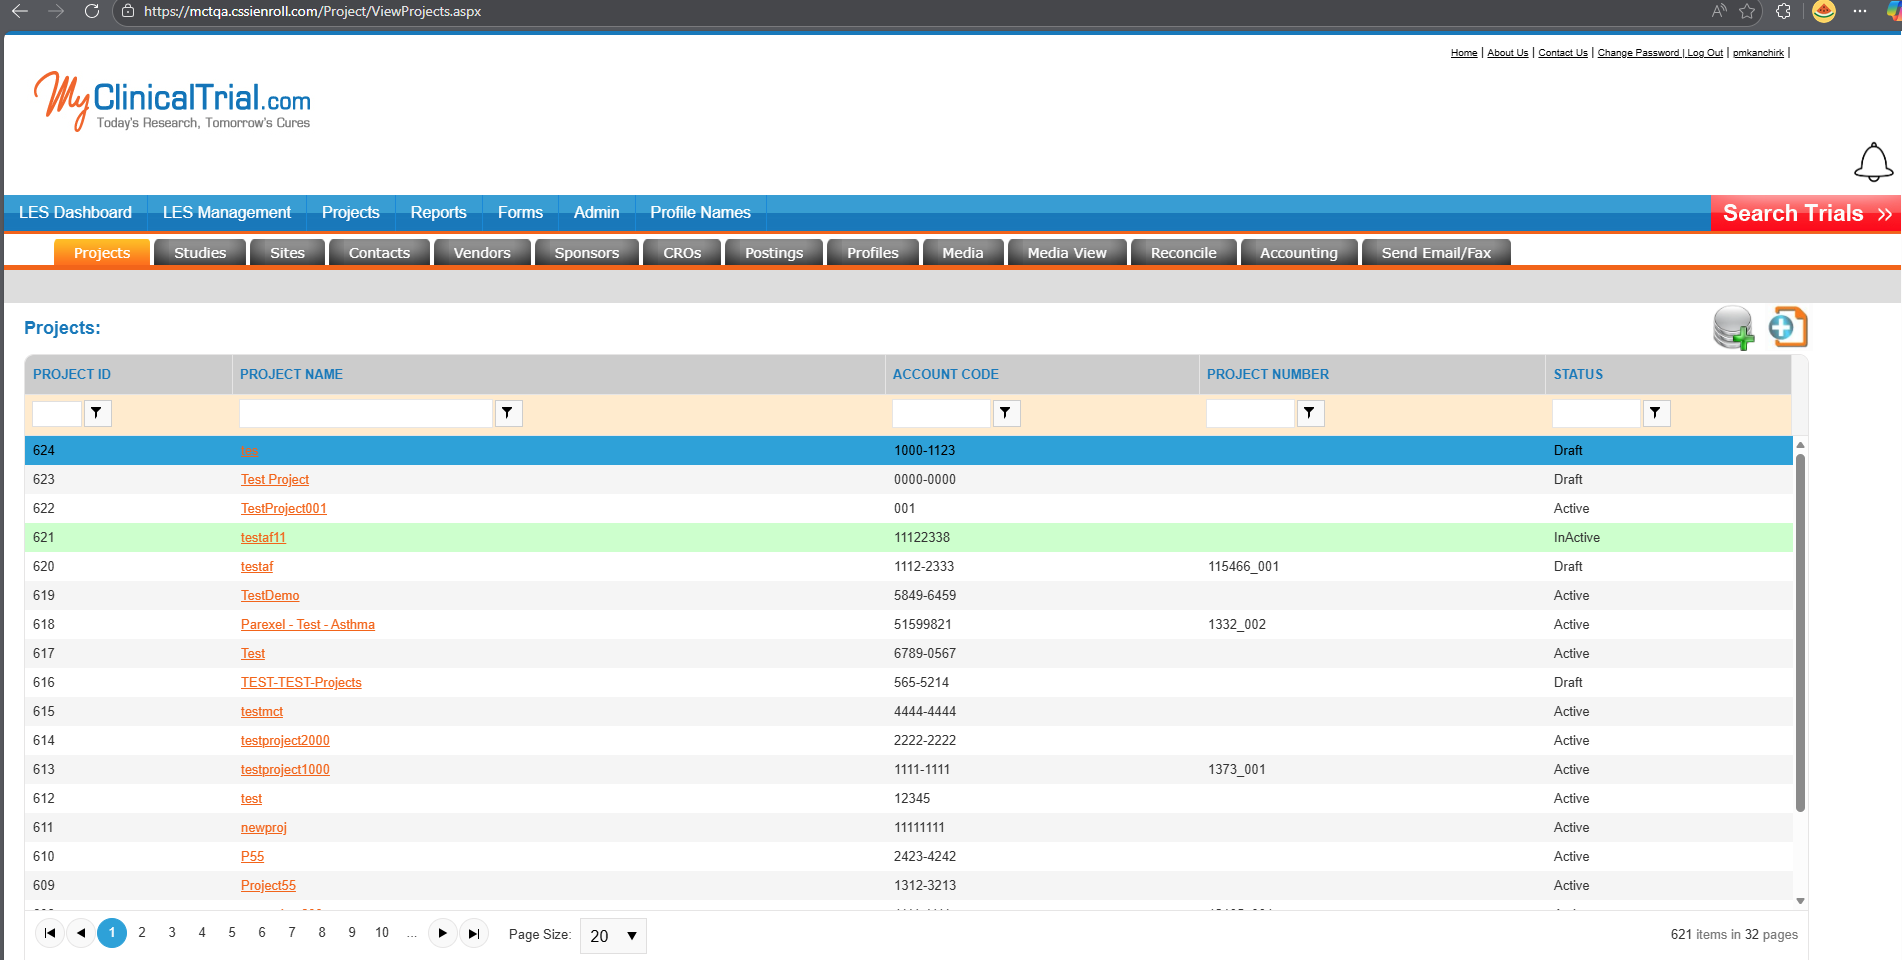
View and Navigate the Projects Table
The Projects table displays all clinical trial projects with the following columns:
- PROJECT ID: Unique identifier for each project (e.g., 624, 623, 622)
- PROJECT NAME: Name of the clinical trial project (clickable link to view details)
- ACCOUNT CODE: Accounting code associated with the project
- PROJECT NUMBER: External project reference number
- STATUS: Current status (Draft, Active, Inactive)
- Filter by Column: Click the filter icon (▼) at the top of any column to filter records
- Sort Data: Click on column headers to sort in ascending or descending order
- View Details: Click on a project name (displayed as an orange hyperlink) to open the project details
- Scroll Through Records: Use the scrollbar on the right to view more projects
Search for Specific Projects
- Use the column filters to narrow down results:
- Click the filter icon (▼) on PROJECT NAME to search by name
- Click the filter icon (▼) on STATUS to filter by Draft, Active, or Inactive
- Click the filter icon (▼) on ACCOUNT CODE to filter by specific codes
- Combine multiple filters to refine your search results
Navigate to Related Project Data
Use the secondary navigation tabs to access related information:
- Studies: Click the Studies sub-tab to view study-level information
- Sites: Click the Sites sub-tab to manage clinical sites associated with projects
- Contacts: Access contact information for project stakeholders
- Vendors: Manage vendor relationships
- Sponsors: View and manage sponsor information
- CROs: Access CRO (Contract Research Organization) data
- Other Tabs: Access Postings, Profiles, Media, Reconcile, Accounting, or Send Email/Fax as needed
Work with Project Records
To view project details:- Locate the project in the table
- Click on the project name (displayed as a hyperlink)
- The project detail page will open
- Draft: Project is being set up and not yet active
- Active: Project is currently running
- Inactive: Project has been completed or paused
Use the Action Buttons
In the top-right corner of the Projects table, you'll find action buttons:
- Look for icons to add new records or export data
- Specific actions available depend on your user role and permissions
Tips & Best Practices
Next Steps
Now that you understand Projects Management, explore the related sections:
- Learn about Studies Management to understand how studies relate to projects
- Check out Sites Management to see how clinical sites are organized
- Explore Contacts to understand stakeholder management
For specific questions about project setup or management workflows, contact your system administrator or project manager.
Navigation
← Previous: Dashboard Overview
📚 Documentation HomeNext: Studies Management →
Generated from MCT Knowledge Base • v1.1.0 • January 2, 2026